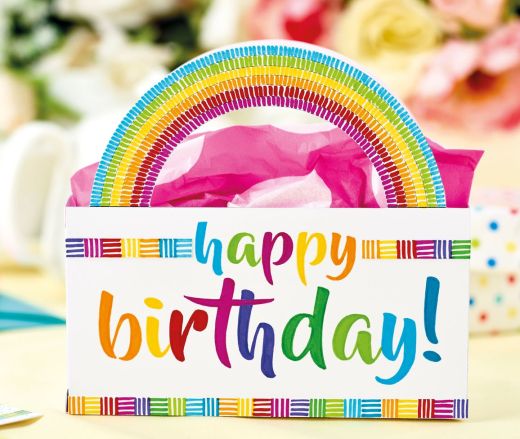
Use STABILO colouring pens to create rainbow card greetings for birthdays and other occasions
What you need...
- STABILO Pen 68 brush, assorted
Card, white
Ribbon, yellow
Lightbox
Adhesives
instructions
-
Create the brightest of rainbows with these super smooth brush pens from STABILO. The well-designed nibs mean you can easily swap from colouring large areas in a flat colour to little dots. An added bonus is the quality of the inks... as bright as any prism! Use Helen Fitzjohn’s original templates to make your very own themed cards with matching tags, plus a gift bag with rainbow handles! Try varying the pressure and angle when using the pens to create a variety of effects, from solid colour and brush strokes, to fine lines and dots.
-
Birthday Card - 1 Print the templates out and colour as before, this time adding darker dots to the tops of each letter. Cut out the area below the rainbow, leaving a cloud shape line.
2 Attach extra cloud shapes along the bottom of the card with 3-D foam pads. Colour ‘happy’ on a separate piece of card, trim into a 3cm x 6.5cm rectangle and stick just below the rainbow. Score and fold a blank as before and attach the coloured image. -
Rainbow Card - 1 Print the templates onto smooth white card. Colour the rainbow with the brush pens, building up with lots of little lines rather than a solid colour. Add multi-coloured lines to the bottom strip.
2 Print the text onto paper and place on a lightbox. Lay the card on top, trace around each letter with a different coloured brush pen, then fill it in. Add dots around the clouds.
3 Trim white card, 7.5cm x 29cm, score and fold at 14.5cm to create a card base. Stick the rainbow design on top. -
Gift Basket - 1 Print two gift basket templates onto thick white card. Colour the rainbows and add blue spots around the clouds.
2 Cut thin strips of white card and draw on a multi-coloured basket weave pattern; four lines of pen vertically in one colour, then four lines horizontally in a different shade.
3 Place the basket on top of the ‘happy birthday’ text on a lightbox and colour. Score and cut out, glue the two pieces together, then stick on the basket weave strips.


