Create some playful pleated decorations in an afternoon with Suzi Attaway's layered rosette design
What you need...
- Items to decorate: Photoframe, vase, box canvas
Paper, Bright Dots, aqua
Ribbon: polka dot; satin; organza; aqua, red, lime, white, pink
Buttons: aqua, red, green, pink
Beading wire, silver, thin
Skewers, bamboo
Pegs, mini
Needle and thread
Adhesives
instructions
-
Basic Double Layer Rosette - 1 For a large rosette, cut spotty paper, 12cm x 24cm. Score at 1cm intervals along the length and fold in an accordian style. Bind some beading wire around the middle of the folded paper and twist the ends to hold in place.
2 Carefully separate the folds to create two fans. Bring the ends of the fans together to make a circle and glue in place leaving two small gaps in the middle of the rosette. Hold in place with mini pegs until the glue has dried.
3 Make a second smaller rosette using a contrasting coloured paper, 10cm x 20cm.
Cut a 20cm length of thin ribbon and thread through the middles of the large and small rosette, then tie a knot to hold them together.
4 Thread on three different coloured buttons, and tie in a bow to hold them in place. Cut six lengths of different ribbons, 15cm in length. Hold the strands together and stitch at one end. Sew the ribbon tails onto the ribbon at the back of the rosette. -
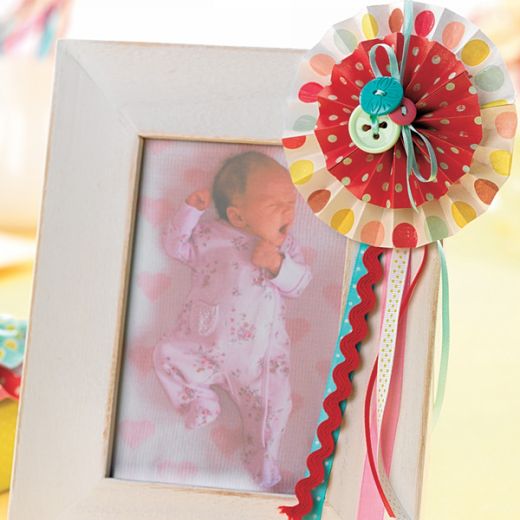
Photo Frame - Using strong glue, simply stick a rosette to the corner of a photo frame, and leave to dry.
-
Wall Art - Spray the back the spotty scrapbook paper with permanent adhesive and stick to the front of the square box canvas. Use a craft knife to trim the edges. Take three paper rosettes in different colours and sizes and glue to the front of the paper-covered canvas. Leave to dry.
-
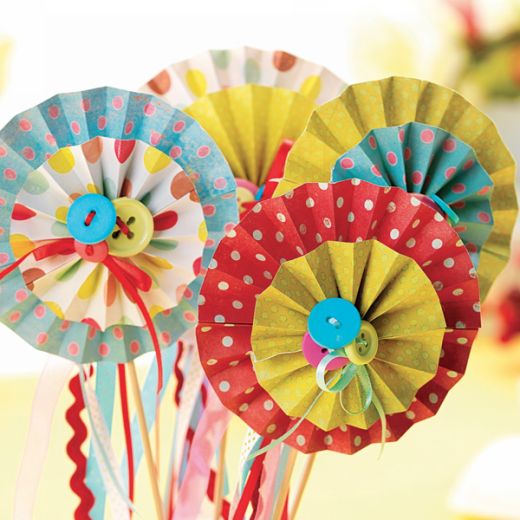
Posy of Rosettes - Make three-five small rosettes in a selection of different coloured spotty papers. Poke the pointed end of a bamboo skewer inside the ribbon-tied middle at the back of a rosette, then secure with glue. Repeat with the other rosettes, and when dry, pop inside a vase.
-
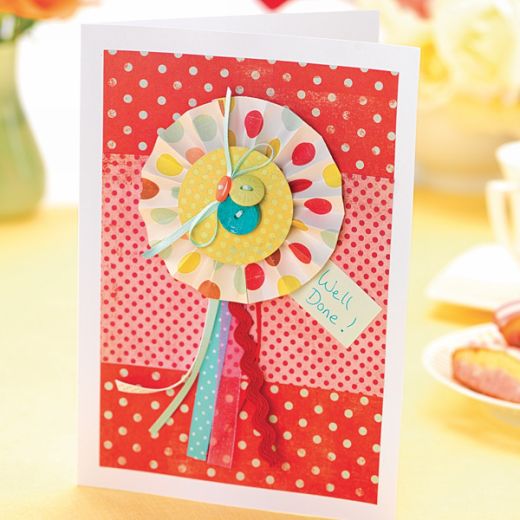
Gift Card - 1 Make a small, single layer paper rosette, then cut out a two inch spotty paper circle and make two holes in the centre. Weave thin ribbon through the pleated rosette and paper circle, then thread on buttons and tie in a bow.
2 Stitch ribbon to the back as before. Cut and stick rectangular pieces of contrasting spotty papers to the front of the folded card. Stick the rosette to the front with strong glue. Make a small pastel-coloured paper tag and stick beneath the rosette and write on a greeting. -
Designer Detail: - For a smaller sized rosette, use contrasting spotty papers measuring 10cm x 20cm, and 8cm x 16cm


