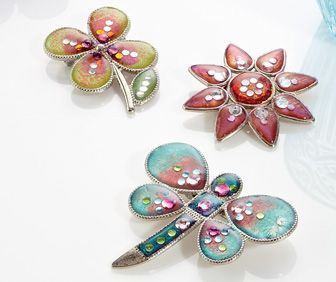
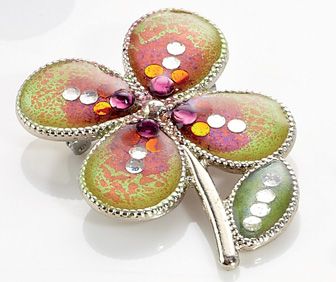
Create Corinne Bradd's stylish brooches by decorating blanks with embossing powders and resin
What you need...
- BEADS Gemstones, coloured, flat back, selection: 3mm; 4mm; 5mm
FINDINGS Embossing powders, Moonglow, selection, Brooch blanks, silver coloured, Casting resin, two part, Alumilite Crystal
TOOLS Measuring cups, Stirrers, Heat gun, Pliers, long-nosed, Bead scoop, Paintbrush, fine, Adhesive, PVA
instructions
-
Brooches - 1. Decide on the colours of embossing powder you wish to use and open all the pots. Lay a piece of clean white paper on your work surface to catch any spills. Choose a brooch blank and grip the clasp on the back in a pair of long-nosed pliers. Use a bead scoop to pour a small amount of embossing powder into the centre of one of the bezels that forms the brooch design.
2. Direct the flow from a heat gun onto the underside of the brooch, about 8cm from the metal, until the embossing powder begins to melt and fuse to the brooch in a smooth coating. Take care to keep holding the brooch with the pliers as it will become extremely hot.
3. Pour powder into the next section and heat as before until all the indented areas are filled with melted powder. If preferred, you can add a second colour over the top by tapping a brush loaded with powder over the inner areas of each section. Heat as before and the new colour will melt smoothly into the original layer.
4. Allow the brooch to cool for a few minutes before gluing co-ordinating colours of gemstones in position with PVA. You can also add tiny photos or printed pictures if preferred; just make sure that the paper is glued down well and there are no air bubbles trapped underneath. Leave the PVA to dry before continuing as damp glue could cloud the resin.
5. Lay the brooches in a line, preferably on top of two strips of wood so the gap between will accommodate the pins and allow the tops to lay completely flat. Take a small plastic measuring cup and pour in 5ml of Alumilite Crystal resin part A. Top up the cup with 5ml of part B and stir quickly but gently with a wooden stirring stick. Brisk whisking will introduce too many air bubbles to the resin but stirring too slowly will allow the resin to start curing before you have a chance to pour the mixture onto the brooches.
6. Once the two parts of the resin are thoroughly mixed and you can no longer see any swirling in the liquid, you are ready to pour. Tip the cup above the first brooch to be covered so the resin stops at the lip. Use the stirring stick to ease the resin over the lip and into the middle of a section of the brooch design. The resin will settle smoothly over the surface of the embossing powder and stop spreading at the edges.
7. You can add more resin bit by bit to create a domed effect but it's difficult to remove excess resin cleanly. Work quickly to fill all the parts of each brooch and clear any air bubbles as you go by lightly 'huffing' on the surface (as you would when cleaning spectacles). The resin will begin to thicken after five or six minutes depending on the room temperature, and become unusable after about eight minutes. If this happens, abandon the resin and mix up a little more in a new cup. As a guide, 10ml will be sufficient for four brooches.
Leave the brooches undisturbed, covered with an upturned plastic box to prevent dust settling on the surface. The resin should be cured after an hour, but the surface will be more resistant to marking if you allow it to cure overnight.
-
Make it yours - Moonglow embossing powders give a fantastic two-tone colour but similar effects can be achieved by mixing a little mica powder into a standard powder.


