Create our crowd pleasers with doilies, dies, map prints and more!
What you need...
- Doilies, white, 8cm - 15cm in diameter
Sizzix Big Shot
Sizzix dies: regal edging, birds, renaissance frame, ornate plate, scallop
Florist wire
Washi tape, green
Pigment, water-soluble: blue, brown
Paper: DCWAV, Ciao Bella Stack; map; music; plain
Card, heavyweight
Lustre spray, gold
Ribbon, 1.8cm wide, striped
Gemstones, flat-back
Iridescent film
instructions
-
Thank You Card - 1 Cover a blank, 14.5cm square, with blue vintage-inspired paper. Dye a 14cm doily blue and spritz with lustre before ironing dry. Glue to a 13cm
circle of iridescent film and add to the card.
2 Use a Big Shot to cut two ornate plate designs from cream and vintage papers. Layer over the doily, as shown.
3 From map and cream papers, cut a doily border and fix to the left of the card so they slightly offset one another. Tint a suitable sentiment with blue pigment and fix to the centre of the card.
4 Die-cut a renaissance frame from patterned paper and adhere to the card, overlapping various elements, as shown. Finish with a bird image. -
Paper Vase - 1 Score landscape A4 card vertically at 5.5cm intervals, then horizontally 3cm from a long edge. Cut from the long side to the intersections, so it can be folded and taped into a square tube and the small sections pressed in for the base.
2 Cover the outside with patterned paper. Cut decorative borders from cream and blue papers, using a Big Shot. Glue the blue to the tube, 1.5cm from the top, offsetting the cream on top. Embellish with gemstones. -
Doily Roses - 1 Soak a doily in a plate of diluted pigment, unglazed-side down. Carefully lift the stained doily and blot with kitchen towel, then press with a hot
iron to dry.
2 Bend the end of florist tape. Cut a line to the centre of a small doily, roll around a knitting needle and secure with washi tape.
3 Slip from the needle onto the florist wire, so the bent end sits inside. Secure with washi tape, wrapping it around the length to create a stem.
4 Make several blooms in different sizes and strengths of colour. Cut larger doilies in half and remove the centre before using. Arrange into a posy
and secure the base of the stems with washi tape. -
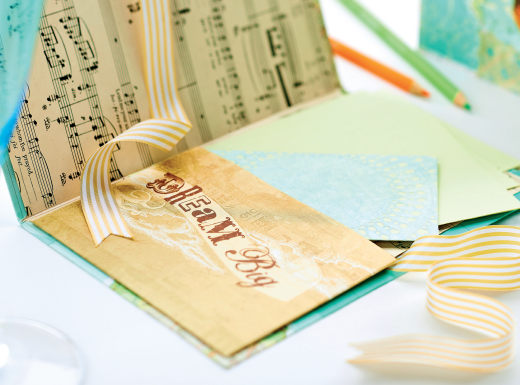
Stationery Folder - 1 Score and fold heavyweight A4 card in half, then cover with a map page. Fold the corners under and secure with double-sided tape, trimming
to form neat mitred folds.
2 Fix two 25cm lengths of ribbon to the inside edges of the folder, covering with two sheets of music paper, 14cm x 20cm.
3 Fold under and fix the bottom and right edges of vintage paper, 11cm x 15cm, then secure to the inside-right of the card to create a pouch.
4 Stain a doily brown, as for the paper roses, then spray with gold lustre and iron. Dye a sheet of music blue and use to cut a decorative frame with the Bigshot.
5 Layer the border over a cream circle and fix to the bottom-right of the cover, folding and securing the sides over the edges. Stain and spritz a suitable sentiment, then place in the centre of the frame. Decorate with flat-back gems. -
Wonderful Design - 1 Dip a music sheet in diluted blue pigment and scrunch. Carefully flatten and iron between a kitchen towel to dry, then use to cover an A6 blank.
2 Dye and lustre spritz two doilies of varied size, one blue and one brown. Cut the larger doily in half, then layer with a circle of music paper between them.
3 Trim a border from cream paper and a bird from a vintage design, using the Big Shot. Stain the bird’s edges with a felt tip pen and position the components onto the card with a greeting.


