Indulge in your favourite sweet treats with clever die-cut cupcakes
What you need...
- Big Shot™ Machine 655268
Bigz™ Circles 656333; Hearts 656334
Sizzlits® Flower Layers set #3 656539; Decorative strip alphabet, Chipblock™ 656917
My Mind’s eye cardstock, ‘Lost & Found’ and ‘Fine & Dandy’
Cream card
Ribbons, pink, blue, red
Small pink/red buttons
Pink Felt
Pink cotton, needle
Sanding block
Adhesive pearls
instructions
-
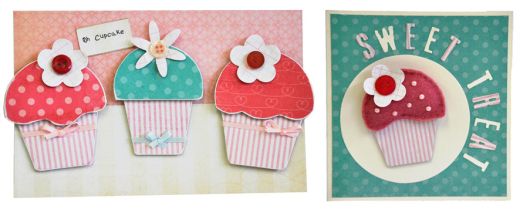
Oh Cupcake - 1 Fold a piece of cream card in half to create a blank 12cm x 18.5cm. Cut a rectangle of pink patterned paper 7cm x 18.5cm and glue to the front top. Trim a rectangle of cream striped card 5cm x 18.5cm and glue to the bottom half of the card.
2 To create a cupcake, first glue the pink or turquoise paper onto some thicker card and use the Big Shot to die cut a large circle. Use a pencil to draw a curvy line a third of the way down the circle and cut with scissors to create a curved edge or use a craft knife and ruler for a straight edge. Sand around the edges of the shape.
3 Die cut a small flower and glue a button to the centre and attach to the top of the cake. For the base, stick striped paper onto thicker card and die cut a large heart. Trim the top and bottom off the heart shape and trim the sides if a sharper angle is needed. Fix the icing part of the cake to the base using adhesive foam pads. Attach a strip of ribbon and a small bow to the base using narrow double-sided tape.
4 Repeat steps 1-3 to create three slightly different cupcakes and attach them to the card using adhesive foam pads. Use a PC to print the phrase ‘oh cupcake’ onto a small strip of cream stripy paper and glue to the card as shown. -
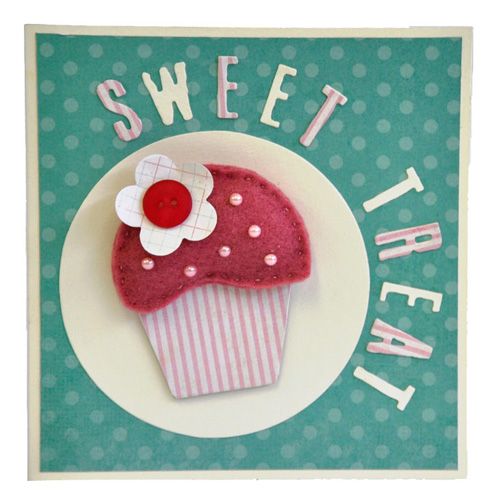
Sweet Treat - 1 Fold a piece of cream card in half to create a card blank 14cm x 14cm, then stick a 13cm square of turquoise spotty card to the centre. Die cut a circle of cream card and glue onto the front of the card in the lower left-hand centre.
2 To make the cupcake, place two pieces of felt on top of each other and die cut using the largest circle. Use scissors to cut a curved edge across, one third of the way down the shape. Hand-sew the two pieces together until there is just a small gap left. Use this hole to fill the cake with wadding, then stitch to close.
3 Die cut a small flower from graph-style paper and glue a red or pink button to the centre. Attach the flower to the top of the felt cake using a hot glue gun. Attach six adhesive pink pearls to decorate.
4 Create the base by attaching some striped patterned paper to a piece of thicker card. Die cut using the large heart and trim the top and bottom edges off. Trim the sides of the heart if you need a steeper angle.
5 Attach the top of the cake to the base using a hot glue gun, then stick the completed motif to the card using adhesive foam pads. To finish, die cut the phrase ‘Sweet Treat’ from cream card, using the alphabet decorative strip die and glue to the front of the card as shown. Die cut every other letter again from striped pink and white paper and glue as shown to finish.
All materials for this project can be purchased online from [url=http://www.mymindseye.com]http://www.mymindseye.com[/url] To find out more about Sizzix and view the whole product range, visit [url=http://www.sizzix.co.uk]http://www.sizzix.co.uk[/url]


